You can import metadata from XMI files into an XMI environment.
To import metadata from XMI files, follow these steps:
- On the Explore tab, click an XMI environment tile to view its details.
Alternatively, in the Data Catalog pane, select the XMI option to view all XMI environments. - Click Options.
The available options appear.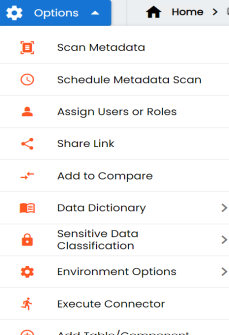
- Click Scan Metadata.
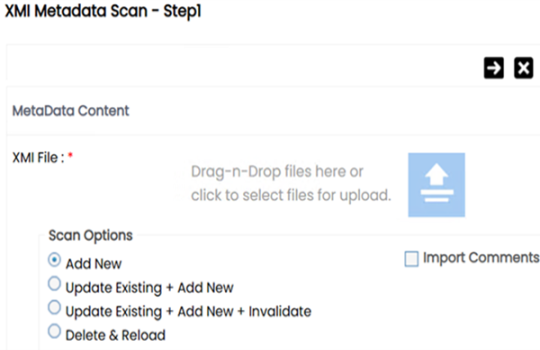
- Drag and drop or use
 to browse and select the XMI file.
 - Use the following scan options:
- Add New
- Use this option to insert new metadata into the environment.
- Update Existing + Add New
- Use this option to update the existing metadata based on tables and columns in the XMI file.
- Update Existing + Add New + Invalidate
- Use this option to update the existing metadata without deleting it.
- Delete & Reload
- Use this option to delete all the business properties and data dictionary stored as metadata for this environment.
- Import Comments
- Use this option to import comments from XMI tables and columns into the environment.
- Skip Empty Cells
- Use this option to skip blank cells in the XMI file from overwriting existing values. This option is available only when you select the Update Existing + Add New or Update Existing + Add New + Invalidate option.
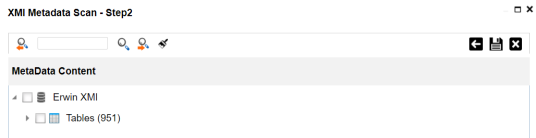
- Click
 .
. - Select the required tables.
- Click
 .
.
The XMI Metadata Scan - Step1 page appears.
The XMI Metadata Scan - Step2 page appears.
The metadata is imported and saved in the environment.